- Planning Products
- Display Products
- Office Equipment
This page will illustrate how to change the cutting head of a 00440, 00442, 00444, 00446, and 00448 DAHLE paper trimmer.
It goes without saying that over time the blade of a paper trimmer will become blunt through general use. Whilst a trimmer will continue to cut through paper with a blunting blade, the cut may not remain clean; leaving fraying marks along the cutting line.
At this stage you may want to consider replacing the cutter head containing the blunt blade, particularly if your shredder is used to prepare documents that need to be displayed or presented to people. This isn't a difficult task with the DAHLE 0044X trimmers, and this page will explain, and show you how.
If you retained the original packaging of your paper trimmer, have a look for a black and white instruction booklet that can make this process easier. Don't worry if you can't find it though, as we will illustrate with pictures.
In order to change the cutter head, you will need:
1.) A screwdriver
2.) A new cutter head
STEP ONE: Push up the red end-caps on both sides of the paper trimmer to reveal the screws that fix the guide rail in place
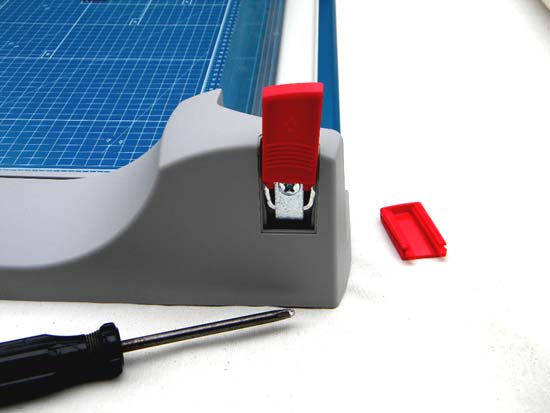
STEP TWO: Unscrew the guide rail cover using an anti-clockwise motion, ensuring you keep the screws and covers somewhere safe once you've removed them.
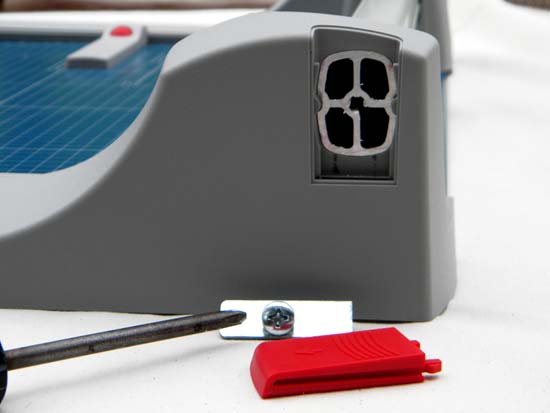
STEP THREE: Push the guide rail towards one end of the paper trimmer, so that the cutter head can then be removed from the guide rail. Do not touch the blade, and place the entire cutter head in the bin straight away.
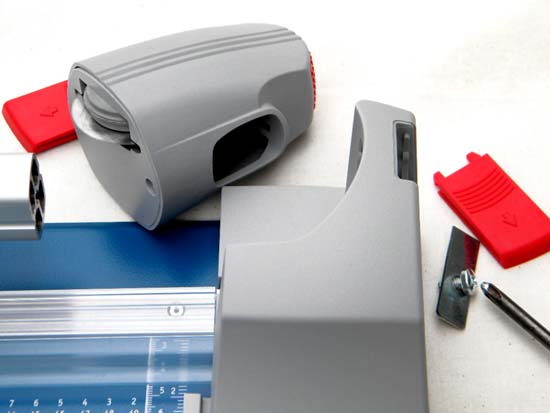
STEP FOUR: Unpackage the new cutter head and slide it onto the guide rail, before pushing the guide rail back into its original place.
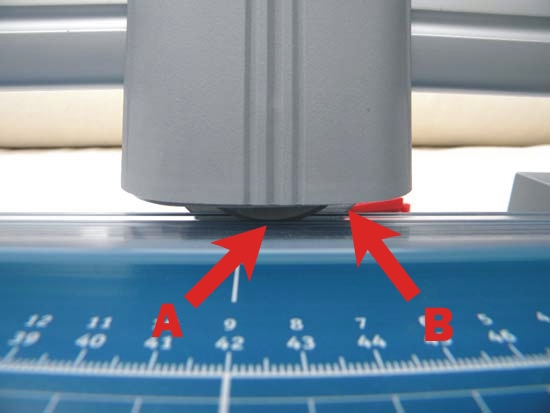
NOTE: The larger blade (B) should be outward facing when placed on the guide rail, with a smaller guide-disc (A) riding along the plastic trench of the paper clamp. Fitting the cutter head the wrong way around may cause damage to the paper trimmer and the trimmer will not function correctly.
STEP FIVE: Reapply the guide rail covers and tighten them with the screws, before replacing the red end-caps.
Your trimmer should now be in perfect working condition once again. If it isn't, review the steps above and ensure that you have followed them correctly, or send us an e-mail here